Continuing our work from yesterday, we started by making measurements and cutting the little pieces that will act as bracing between the plywood post. In the spirit of making the whole thing deployable anywhere, we decided not to screw these pieces to the post but instead to use the same method of the dowels to lock them in place.
 |
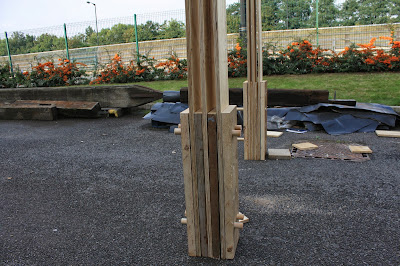
| Smaller plywood pieces to brace the post in between |
 |
| Using dowels yet again for the inner brace |
 |
| Carrying the post is relatively easy (according to Giannis who carried it first) |
While that was going on we tested out the second post to complete the frame and questioned its structural integrity, rigidness, flexibility and overall finesse. Lifting and moving the post in place was relatively easy which indicated its easy deployability while at the same time locking it in place was none the harder.
 |
| Locking the post and the beam in place |
 |
| Free standing structure! |
At the moment we have experimented with two different types of posts. The one at the front is timber-ply-timber-ply-timber-ply-timber while the one at the back is timber-ply-ply-ply-ply-timber. We've explored the structural integrity in each case and the materials required as we are shorthanded on this aspect of our project.
For more efficiency we decided to split in groups: Group 1 would stay on the small braces and work out calculations and depths of the holes for the interlocks, Group 2 would cut and mark the next plywood panel in order for it to be assembled as a new post tomorrow and Group 3 would work on a new variation of the beam that we wanted to test out. This new beam will consist of 2 timber panels on the outer side while braced with small pieces of plywood.
 |
| Group 1: Bracing the inner sides of the column |
 |
| Cutting and marking the next plywood panel |
 |
| Creating a new variation of a beam |
Our design concept is to criss cross at least two frames thus creating a space underneath and in order to do that we need to lock the two beams together. Our approach to this matter involves creating 2 mirrored notches for the beams to interlock.
 |
| Notches on the first beam |
 |
| Notches on the second beam |
 |
| Mirrored notches on the beam to allow flexibility to interlock with the other beams |
Everything seems assembled and ready to transform our conceptual lines into reality. It seemed rather clear that the second beam was too heavy and risky to get the green light for our construction line but everything else is rigid and stable. Even though we still miss two posts for the load to be transferred correctly, the structure is quite solid as a unit and we are very optimistic that when the other posts are in place as well it will be much stronger.

Alex was there as well to give as some tips and advice concerning our future steps on the project for tomorrow. We need to replace the second beam with one made of plywood which will be much lighter and will have more potential to support a roof. A base is needed of a size at least the footprint of the column but that is something we left on the side for tomorrow. In the spirit of learning from our mistakes we covered all our wood pieces with a large fabric and the acrylic panels we have as spare materials as we already lost some pieces to the rain.
 |
| Shhhh.... She's sleeping |


No comments:
Post a Comment